Install in IIS
Cortex version 2.0 (and beyond) require a read-write connection to a Cortex-specific data store. This can be the same database, a completely separate database, or a completely separate database server/service.
You can find more information about how to configure this on the Connection Strings page.
Pre-requisites
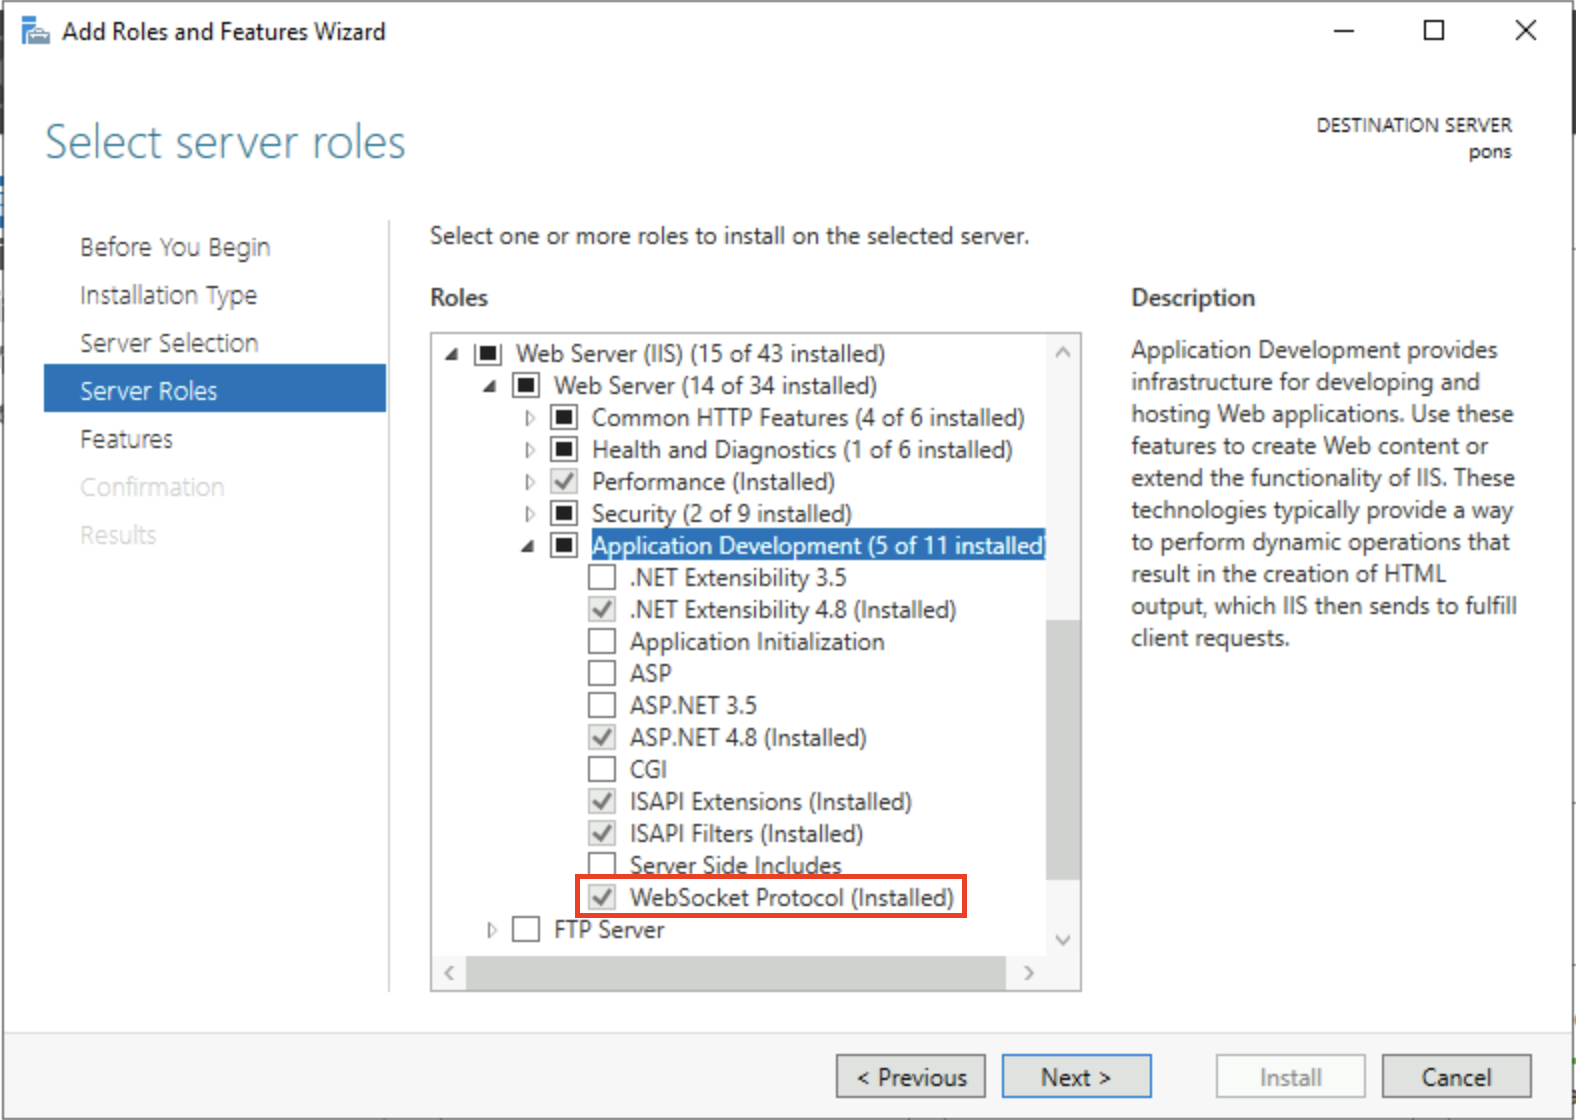
- Windows Server, with IIS (select the WebSockets optional feature when installing)
- Your Cherwell database, restored to a Microsoft SQL Server instance (with Full Text Indexing installed)
(NOTE: The IIS server can be the same machine that you have Cherwell running on, but does not have to be. You don't even need Cherwell running anywhere at all -- Cortex has everything it needs to interpret the data in your database.)
Install
1. Install Prerequisites (VERY IMPORTANT)
-
Ensure IIS is installed and has WebSocket support enabled. (Go to "Add/Remove Windows Features" and select "WebSockets" under the IIS optional items).
-
ASP.NET Core Module/Hosting Bundle
This is a Microsoft-provided tool that allows IIS to run modern (.NET Core and .NET 5+) ASP.NET applications.
After the installer finishes, restart IIS (you do not need to restart the whole machine).
-
Make sure you have your SQL server connection information handy. This is the same information you used when you set up your Cherwell server and is NOT the Cherwell app server connection you use to set up your clients.
2. Download and install Cortex
Pick the appropriate build for your system.
- win-x64 - Self-contained build for Windows (does not require an installed .NET runtime)
- net7 - Runtime-dependent build for any OS (requires an installed .NET 7 runtime)
Download the appropriate Zip file (registration required) to your IIS server. Inside the zip file is a single folder,
which needs to be placed somewhere that IIS can access it. Common locations are
C:\ and C:\inetpub\wwwroot. If you choose a different location, ensure that
the user IIS_IUSR has read access (write access is not required, nor
recommended).
3. Configure an "application" in IIS
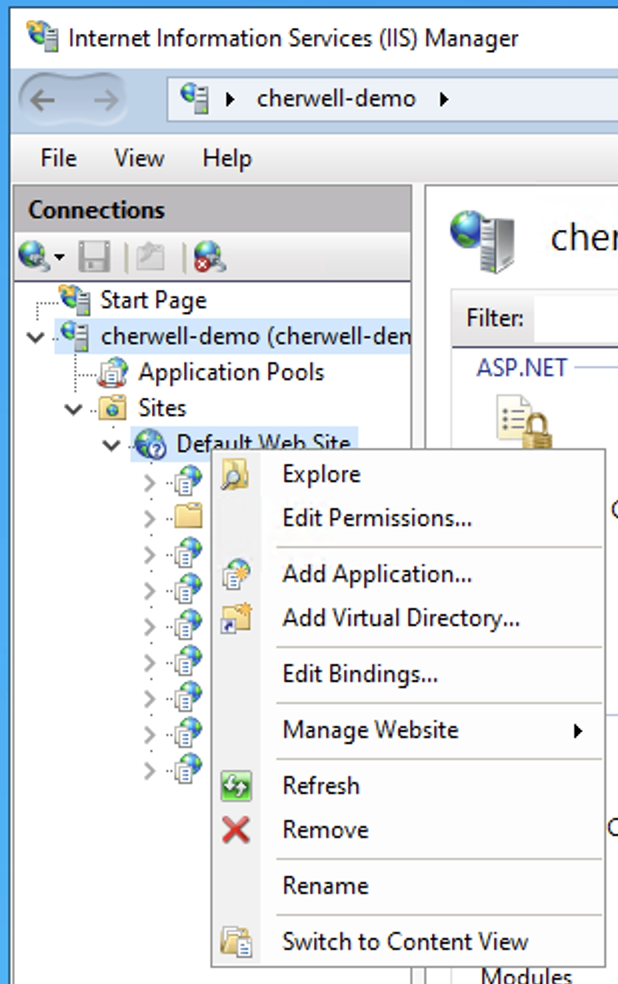
- Open "Internet Information Services (IIS) Manager" from the Start Menu.
- In the left side, expand the tree until the level below "Default Web Site" is visible.
- Right-click "Default Web Site" and choose "New Application".
- For Alias, enter "Cortex". This will make the application accessible
at
http://YOUR_SERVER_NAME/Cortex. - Choose the Physical Path where you unzipped the Cortex files. This should be the level
above
wwwroot, typically named something likecortex-win-x64-v1.1.1.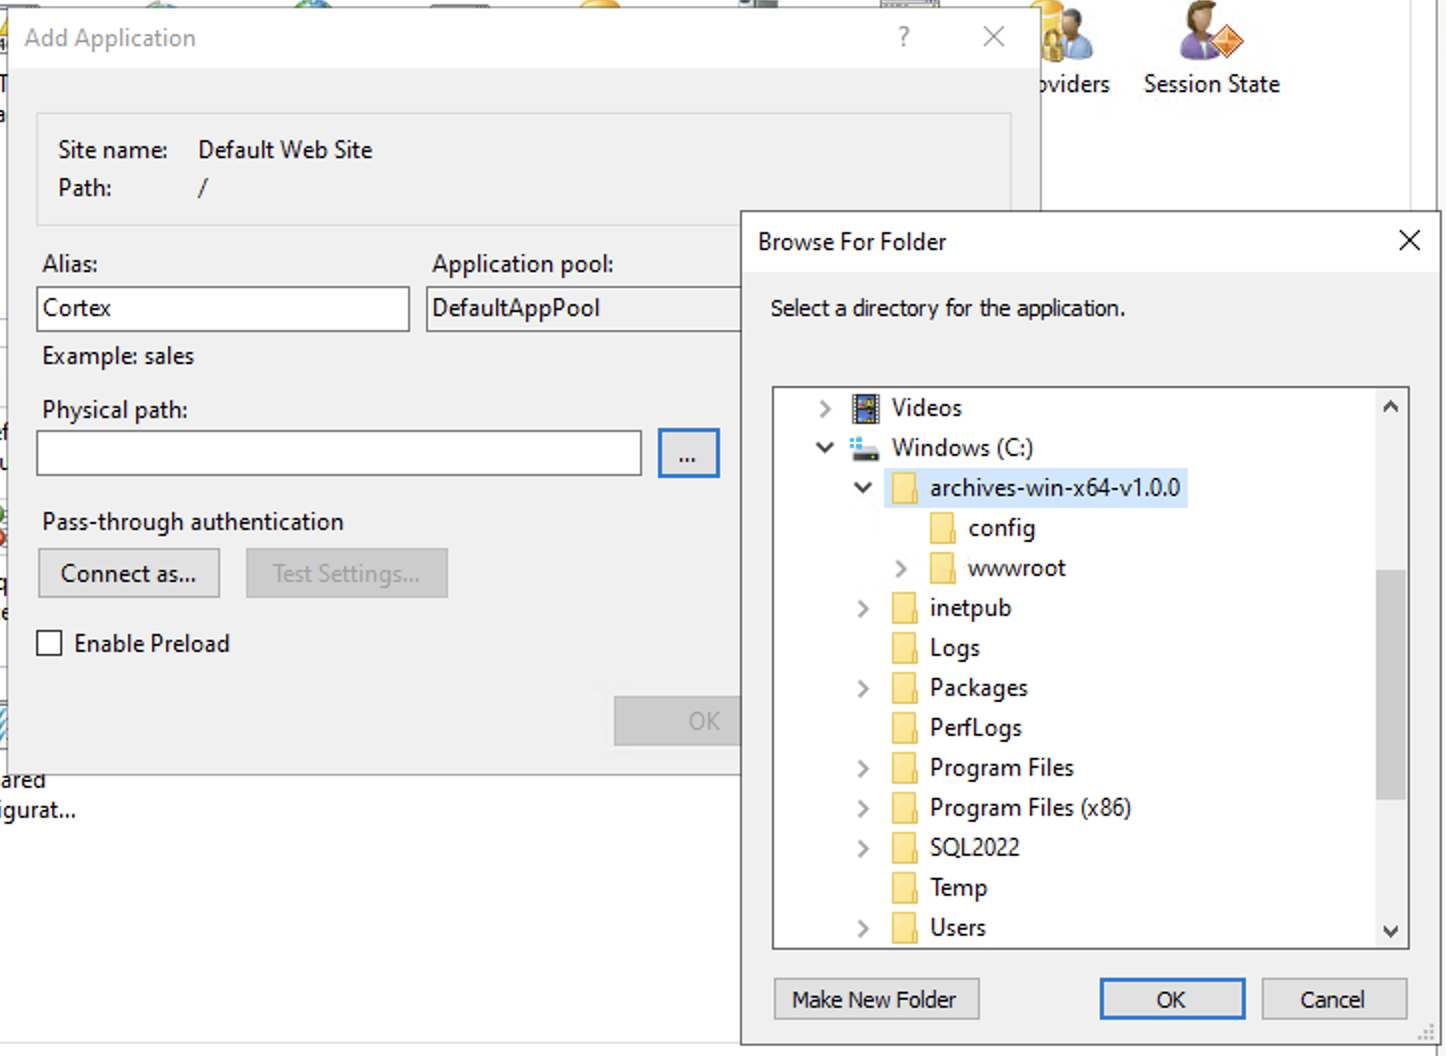
- Click "OK".
Configuration
Three items need to be configured:
- Database connection to a previously installed Cherwell database (See here for details on creating a connection string)
- Your Cortex License "company name" and License code (NOTE: These are different from your Cherwell license)
- Your desired authentication type (even if it's "none")
If you don't have a Cortex License, the software will run with result sets limited to 10 records.
Configuration Files
Edit the file appsettings.json to fill in the following values:
{
  // ...
  "ConnectionStrings": {
    "Cherwell": "READ (WRITE OPTIONAL) CONNECTION STRING FOR CHERWELL DATA",
    "Cortex": "READ/WRITE CONNECTION STRING FOR CORTEX DATA"
  },
  "Licensing": {
    "CompanyName": "YOUR COMPANY'S NAME HERE",
    "LicenseCode": "YOUR LICENSE CODE"
  },
  "Authentication": {
    "Type": "ONE OF: none, saml, keycloak",
    // ...
  }
}
After modifying this file, restart the application to apply the configuration.
Next Steps
HTTPS/SSL
If you are using SAML for authentication, HTTPS/SSL may be required (it is certainly recommended). If you add HTTPS later, you may have to change your SAML configuration.
It is highly recommended that you configure HTTPS/SSL for the server running the Cortex application. How to do this is outside the scope of this documentation, because it is highly environment and infrastructure dependent. For instance, you might choose to use a self-signed certificate installed in IIS. Or a fully-signed cert from a local certificate authority. Or a full cert from a third-party CA. Or you might run a reverse proxy in front of either IIS or a container, that handles HTTPS in yet another way.
We might be able to provide guidance if we have familiarity with your specific technology, but the most knowledgeable people will undoubtedly be your own infrastructure team.
Authentication
In most cases, we start with using the authentication type none so we can verify
connectivity to your database without adding extra variables to the mix.
However, Authentication:Type none is not recommended for production. You
should instead configure your desired authentication type (SAML or OpenID
Connect).
Leaving Authentication:Type set to none means that all of your data is accessible
to anyone who can visit the HTTP site on the system running Cortex and is extremely
insecure. This mode is meant solely for initial setup and verification.